# Create a blog using VuePress (Part 2)
Continued from Part 1.
# Custom CSS
The next step is to modify the theme of the blog slightly. To do that, I created .vuepress/styles/palette.styl file:
$accentColor = #007acc
Furthermore, I wanted to remove this svg on all outbound links:

A simple inspect showed me that is was being set by this:
.icon.outbound {
  color: #aaa;
  display: inline-block;
  vertical-align: middle;
  position: relative;
  top: -1px;
}
In order to hide that svg using CSS I created .vuepress/styles/index.styl file:
.outbound
  display:none !important
This was the result:

# Ordering posts
The last thing I wanted to achieve was to order the posts in reverse chronological order. I modified our original PostList Vue component to add a sort function:
computed: {
  posts() {
    const path = this.$page.path
    const posts = this.$site.pages
      .filter(p => p.path && p.path.startsWith(path) && p.path !== path)
      .sort((a, b) => {
        return new Date(b.frontmatter.date) - new Date(a.frontmatter.date)
      });
    return posts;
  }
}
# Deploying to Zeit Now
Finally, it was time to deploy my blog. For that, I used ZEIT (opens new window). I connected (opens new window) ZEIT to my GitHub account and pointed it to the correct repo. I then filled the following options:
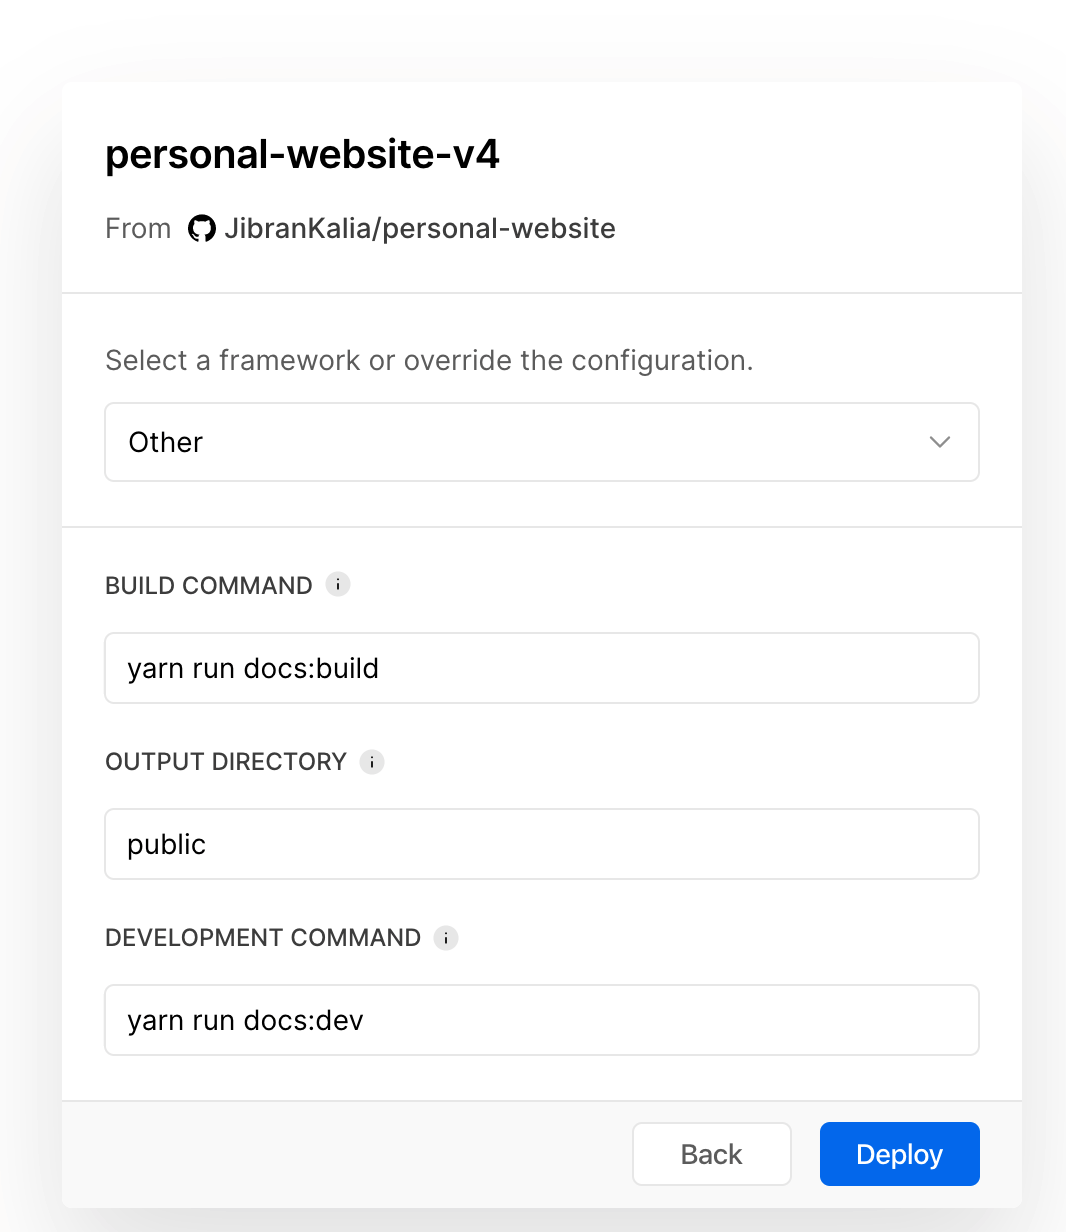
and voila my website is live!
Continued in Part 3 of this series.